Table of Contents
- How to Add an Interactive Floor Plan to Your Website
- What You Need Before You Start
- Step-by-Step: From Render to Live Widget
- Adding the Embed to WordPress
- Adding the Embed to Webflow
- Adding the Embed to a Custom Site
- DIY Plugin vs Done-for-You
- Ready to Add Yours?
- Frequently Asked Questions
How to Add an Interactive Floor Plan to Your Website
If you sell units in a tower or a multi-story development, the fastest conversion upgrade you can make is to add an interactive floor plan to your website. Instead of a PDF a buyer has to download and squint at, you give them a clickable version of your own render: they hover a unit, see the price, floor, area, view, and live status, then inquire in one tap. No sales call to answer basic questions.
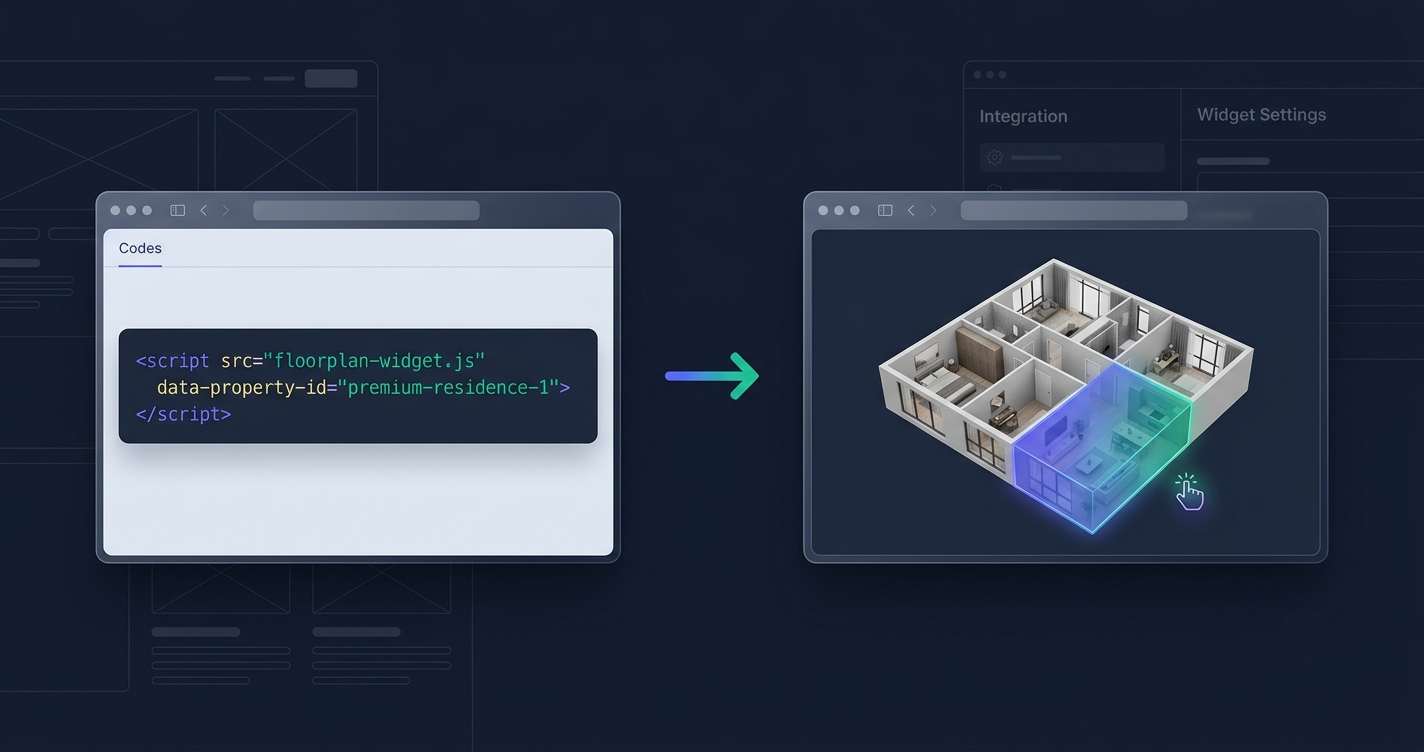
The good news is that adding it does not mean rebuilding your site. A modern interactive floor plan ships as an embeddable widget — a single script tag you paste into a page — so it drops into WordPress, Webflow, or a custom build without a migration or a redesign. This guide walks through exactly what you need, the general steps to go from a flat render to a live interactive floor plan, and how the embed behaves on each platform.
If you are still deciding whether this is right for your project, start with what an interactive tower map is and why interactive floor plans lift pre-sales. This post assumes you are ready to actually put one on the page.
What You Need Before You Start
To add an interactive floor plan to your website, you really only need two things — and you almost certainly already have both.
1. A tower or floor render. This is the visual base — the 2D elevation, floor plate, or building render you already use in your brochures. PNG, JPG, SVG, or even a PDF export works. The interactive floor plan is mapped directly onto your image, so it looks like your project, not a generic template. This is a real interactive floor plan widget built on your artwork, not a 3D game engine, so it stays lightweight and loads fast on mobile.
2. Your unit data. For each unit you want buyers to explore, gather what you want revealed: price (or “on request”), floor, type, area, view, and current status — Available, Reserved, or Sold. If you have per-unit galleries and floor plans, include those too. You decide what each unit shows; a corner penthouse can reveal a full gallery while an unreleased floor shows only “Coming soon.”
That is the entire input list. You do not need a developer on staff, a design system, or a particular tech stack. Everything else — the overlays, the data connection, the embed code — is handled in the build.
Step-by-Step: From Render to Live Widget
Here is how a flat render becomes an interactive floor plan embedded on your site. Whether you attempt a no-code plugin or go done-for-you, the shape of the process is the same.
Step 1 — Prepare your image
Export the highest-quality version of your render you have. Cleaner artwork means cleaner, pixel-precise unit boundaries. Crop out anything that is not the building or floor plate so the interactive area lines up with what buyers actually click.
Step 2 — Map the unit overlays
Every clickable unit needs a boundary — a scalable vector shape drawn on top of your image so it stays sharp and correctly positioned on desktop, tablet, and mobile. This overlay step is the craftsmanship part: each unit polygon is traced to match your render exactly. Get this right and buyers can tap the specific apartment they want; get it sloppy and the hotspots miss. (For the two-dimensional approach versus a 3D one, see interactive 2D vs 3D floor plans.)
Step 3 — Connect the unit data
Each mapped unit is linked to its record: price, floor, type, area, view, status, gallery, and floor plan. This is what turns a pretty picture into an interactive floor plan — hovering or tapping a unit surfaces live information, and the status field is what shows Available, Reserved, or Sold in real time.
Step 4 — Get your embed snippet
Once the overlays and data are wired up, the widget produces an embed code — typically a single <script> tag (sometimes paired with a container <div>). This snippet is all your website needs. It pulls the interactive floor plan in on demand and keeps it in sync with your data.
Step 5 — Paste it into your site
Drop the snippet onto the page where you want the floor plan to appear — a project page, a “Residences” section, a landing page. Publish. The interactive floor plan renders inside your existing layout. When you later change a price or flip a unit to Sold, you do it from the dashboard and the live page updates — you never touch the embed code again.
Adding the Embed to WordPress
WordPress is the most common case, and it is a no-code paste. In the block editor, add a Custom HTML block to your page and paste the script tag inside it, then update the page. If you prefer working outside the editor, most themes and page builders (Elementor, Divi, Gutenberg) offer an HTML or “code” widget that does the same thing.
One caution: WordPress’s visual editor sometimes strips <script> tags for security, and a few managed hosts sanitize them. If the embed vanishes on save, use a trusted code-embed block/plugin or add it to the theme where scripts are allowed. A done-for-you provider will confirm the snippet survives on your specific setup.
Adding the Embed to Webflow
Webflow makes this clean. Drag an Embed element (the </> component) onto your page, paste the script tag into it, and publish. The interactive floor plan appears exactly where you placed the element, inside your Webflow layout and responsive breakpoints. Because the widget is self-contained, it will not fight with your Webflow styles. This is the same pattern you would use to add interactive site plans or an interactive building visualizer to a Webflow project.
Adding the Embed to a Custom Site
On a hand-built site — React, Next.js, Vue, plain HTML, or anything else — you simply place the snippet in your markup where the floor plan should render. In a component framework, drop it into the component that owns that page, or inject the script on mount. There is no rebuild and no dependency to install: the widget loads itself and mounts into its container. Because it is lightweight and framework-agnostic, it does not add heavy 3D payloads or bloat your bundle.
DIY Plugin vs Done-for-You
You have two real paths to add an interactive floor plan to your website: wire it up yourself with a plugin or builder, or have it built and run for you. Here is the honest comparison.
| Factor | DIY plugin / builder | Done-for-you (FoudaTech) |
|---|---|---|
| Unit mapping | You trace every boundary by hand | We map your render for you, pixel-precise |
| Your render | Fit into template constraints | Built directly on your own artwork |
| Live status | Manual, if supported | Available / Reserved / Sold, live from a dashboard |
| Management dashboard | Varies / often none | Included — edit price, status, galleries anytime |
| Hosting & uptime | Your responsibility | Included in the subscription |
| Updates & edits | You do them all | Unlimited edits, updates, and support included |
| Performance | Depends on the plugin | Lightweight, fast on mobile, no heavy 3D |
| Time to live | Hours to weeks of your time | ~2 weeks, done for you (expedited available) |
| Pricing model | Plugin/subscription you operate | One-time setup fee + annual subscription |
The DIY route can work if you have the time and someone comfortable tracing overlays and maintaining data. The done-for-you model exists because most developers would rather be selling units than drawing polygons. With FoudaTech, we custom-build the interactive floor plan on your render, connect your unit data, host it, and hand you a live management dashboard so your team flips a unit to Sold or updates a price in seconds. It is delivered as that same single embed — so everything in the platform sections above still applies — for a one-time setup fee plus an annual subscription that covers hosting, the dashboard, updates, support, and unlimited edits.
Ready to Add Yours?
You already have the render and the unit list — that is the hard part done. Adding an interactive floor plan to your website is then a matter of mapping, connecting, and pasting one line of code.
If you would rather skip the tracing and maintenance entirely, explore Interactive Tower Maps to see how the done-for-you build works, or get in touch with your render and unit count for a quote. Standard delivery is about two weeks, with expedited options when you are launching sooner.
Frequently Asked Questions
Do I need to rebuild my website to add an interactive floor plan?
No. The interactive floor plan is delivered as an embeddable widget — a single script tag that drops into your existing page. It works on WordPress, Webflow, and custom sites with no migration, no redesign, and no framework lock-in.
Can I add the interactive floor plan myself, or do you install it?
Both are fine. The embed is copy-paste simple, so many developers add it themselves in a WordPress Custom HTML block or a Webflow Embed element. If you would rather not touch it, we place the snippet and confirm it renders correctly on your specific platform as part of the done-for-you build.
What do I have to provide to get started?
Two things: your tower or floor render (PNG, JPG, SVG, or PDF) and your unit data — price, floor, type, area, view, and status, plus any galleries or floor plans you want each unit to reveal. You choose exactly what each unit shows buyers.
How is the live Available / Reserved / Sold status updated?
Through your management dashboard. Your team toggles a unit between Available, Reserved, and Sold, updates pricing, or swaps gallery images, and the live embed on your site reflects it — no developer and no code changes needed after delivery.
Will an interactive floor plan slow my page down?
No. It is built lightweight and framework-free, and it loads fast on mobile rather than shipping a heavy 3D model. The widget loads itself into its container without bloating your site’s bundle.
How much does it cost, and how is it priced?
It is a one-time setup fee plus an annual subscription in USD — the subscription covers hosting and uptime, the management dashboard, updates, support, and unlimited edits. Starter builds begin around $1,200 setup plus $600/year, with Growth and Premium tiers for larger, multi-tower projects. Contact us with your unit count for an exact quote.